What the Judges are Looking For
Veterinary Judges
Veterinary judges, who are doctors of veterinary medicine, evaluate the horse's condition, soundness, and trail ability/manners. Condition or stamina of a horse is judged by recognizing the signs of fatigue and then scoring the varying degrees on each horse. Condition is evaluated before, during, and after the ride for proper comparison.
Pulse, or heartbeats per minute, is a standard measure of physiological status. In a well conditioned horse, the pulse should return to 48 or less following a 10 minute rest or recovery period. NATRC guidelines score 1 point for each 4 beats above 48 after 10 minutes.
Respiration can be a measure of fatigue, but it is also an indicator of body heat. If a horse's temperature becomes elevated, the respiration increases in an effort to blow off excess heat. Normal recovery is 24 breaths per minute or less. Each 4 breaths/minute above 36 scores 1 point against the horse.
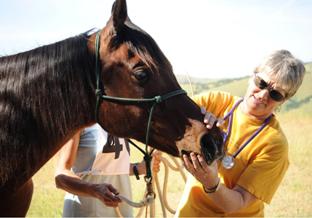
Photo by Mike Soloman
Dehydration, or water loss through sweat, panting, urine and feces, is a major detriment to trail horses. The veterinary judge evaluates this in several ways. One is to pinch the skin on the point of the shoulder. Normally this pinched up fold of skin will go down immediately when released. As the horse becomes more dehydrated, the fold will remain longer, sometimes several seconds. Another criterion reflects how dehydration affects blood circulation. The gums, which are mucous membranes, are good indicators. Normal gums are moist and pink, varying in degree with each horse. As the horse becomes fatigued or dehydrated, the gums may dry out with the color becoming pale, blanched, or more severely, muddy, jaundiced, or blue (cyanotic). Capillary refill is measured by the time required for the color to return after pressing on the gums with the thumb. Normal time is 1 or 2 seconds, and in stressed horses it may become several or many more seconds.
Fatigue can be judged by changes in the horse's attitude: alertness of the eyes, ears, facial expressions, actions such as nickering, interest in surroundings, changes in the gait from the normal springy long strides to the fatigued, short choppy, plodding, and stumbling steps and the unwillingness to go on.
The digestive system is evaluated by monitoring the horse's appetite, gut sounds, and desire to drink. A fatigued horse shunts blood away from the gut to other areas of the body. The result of this is to reduce gut motility and sounds. Absent gut sounds may indicate fatigue or impending colic. Exhausted horses will also lack control of the rectal sphincter muscle which may be flaccid and open. These are scored subjectively according to the judge's opinion of the severity.
Other symptoms of fatigue are muscle tremors or synchronous diaphragmatic flutter (thumps), seen as a rhythmic twitch in the flank; and a change in the character of sweat from normal watery to thick, sticky, and strong smelling to even stopping. A dry horse that should be sweating is a danger signal.
Many judges may use additional factors for judging condition depending upon their own experience and observations. Riders should learn to evaluate their own horses, especially when working at home on strenuous rides. Never stress your horse beyond the guidelines mentioned.
Soundness is judged by examining and by watching the horse move. Obvious faults are lameness, saddle and girth sores, sore back muscles, chafed lips from the bit, other tack injuries, defects of vision, and blemishes and wounds that develop on the ride. In general, the scores against a horse are relative to changes observed during the course of the ride, from check in to check out at the judge's discretion. However, a horse that checks in with a fault may be scored down relative to horses without faults even though the fault does not worsen on the ride. This is subjective and is the opinion of the judges.
Way of Going is the judge's opinion of how your horse moves as a trail horse. Ideally we want a sure footed, free moving, long, easy striding gait, easy to ride yet energy efficient to the horse. Excessively high action, short and choppy steps, or sluggish, inconsistent strides are faulted. Winging, padding, forging, interfering and scalping are gait defects that are detrimental to efficient travel. Chronic stumbling or too low action may be faulted. Way of Going is evaluated in hand and under saddle on the trail.
Manners are subjectively judged as to the horse's suitability as a trail horse. Safety is paramount. The horse should allow you to mount safely under a variety of trail conditions. Spooky horses that repeatedly shy on the trail are unsafe and not pleasurable to ride. Head tossing, fighting the bit, response to rider aids and overall control on the trail are some of the factors judged. In-camp behavior is also judged. Poor tying behavior, pawing, constantly calling stable mates (buddying), being bam sour or cold backed, kicking, etc. are all vices that cause a loss of points on the scorecard. The good trail horse should stand and allow examination of feet, legs, eyes, teeth, gums, etc. A horse that cannot be examined can hardly be fairly placed.
Horsemanship Judges
Horsemanship judges are horsemen/women experienced in NATRC competitive trail riding and have met NATRC's requirements to become horsemanship judges. They evaluate the care of your horse, equitation as it applies to long distance riding, trail safety and courtesy, and your performance as a team. Although more subjective than veterinary judging, much of the judging is standardized.
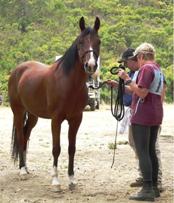
Photo by Jamie Dieterich
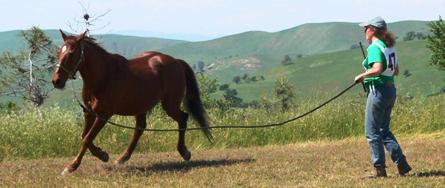
Photo by Jamie Dieterich
Regardless of which method you choose, always keep both hands on the lead rope. Make large, smooth circles to show your horse off to his best advantage for the judge.One of the most important aspects of the ride is the in-hand presentation and trot out. Veterinary judges monitor the horses to see what the effects of the ride are on the horse. Notes are made on the horse before the ride, during the ride, and after the ride. A good presentation is very important for a good evaluation.
Presenting your horse to the judges is your opportunity to show your horse at his very best. Your horse should be well-groomed, sweat marks brushed away, hooves cleaned out, and dirt removed from around eyes and nostrils. Make sure his feet are in good shape and his shoes, if he wears them, are secure and in good condition. Check to make sure the halter fits well and all the ends are tucked in. Although this is not a showmanship class, a neat and tidy appearance goes a long way to making a good first impression.
As you approach the judge, for safety, make sure both hands are on the lead rope. It should be folded in a figure-eight (not looped) in one hand. The other hand should be grasping the lead rope close to the halter for ready control. Be careful not to grab the halter and accidentally slip a finger through the ring. Stand beside your horse and pay attention to the veterinarian. You should always be on the same side of your animal as the vet judge to maintain control and protect the judge. It's unsafe to stand directly in front of your horse. To allow the veterinary judge ample space for examining the eyes, nose and mouth, you may momentarily move to the other side.
Follow the directions you are given to trot out. Usually the veterinary judge will ask you to trot straight out, circle your horse once or twice in each direction, and then trot straight back to the judge. Practice this at home with some variations. Some people prefer to lunge their horses in the circles, while others lead their animals. Either is acceptable.
Be careful to not let the lead rope drag the ground or get tangled around your feet. Looking back at the horse, while running beside him, probably sends a message to him to slow down. Try to not block the judge's view by getting between the horse and the judge. Letting the horse crowd into your space at any time, including the trot-out and back, is hazardous and usually reflects problems with respect in other areas as well. In the case of gaited horses, keep the horse in a lively, constant gait through the trotting presentation. Practicing your presentation at home until you and your horse are relaxed and confident will pay off handsomely on your scorecards later. One horsemanship judge said it best... "It's not practice that makes perfect, it's PERFECT practice that makes perfect."
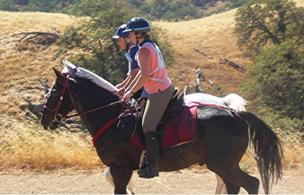
Photo by Julie Willitt
The primary concern of proper equitation is to make the horse's job of carrying a rider over long distances as efficient as possible. The key is to ride balanced and light in the saddle at the walk, trot, or canter. A vertical line should pass through your center of gravity and continue through your foot. Ideally, if the horse were to suddenly evaporate from under you, you would land upright, on your feet. Leg contact with the horse should support you without tension or stiffness. If you are riding light, you will appear to be almost floating with the horse. Use your legs and ankles as shock absorbers. Don't sacrifice proper support from the lower legs by bracing your legs out to the side. (Hint: Riding bareback may help you understand the benefits of proper leg position and contact.)
Much of competitive trail riding is done at the trot. If you post, don't rise on the same diagonal all the time or your horse will get sore on one side. Similarly, be sure the horse doesn't always use the same lead at the canter. Don't lean so far forward over the horse's neck that you place extra weight on his forehand.
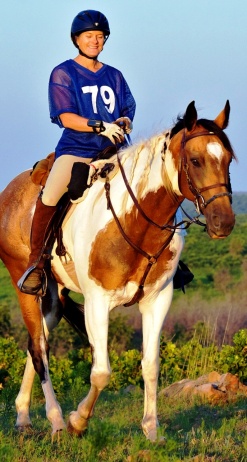
Photo by Jim Edmondson
The rules state that a saddle must be used and the horse must be under control. This gives the riders a lot of latitude, and you will see a great variety of gear, with mixtures of western and English tack.
Leather is quite serviceable if clean and in good repair. Synthetic materials (nylon, biothane and zilco) have become very popular because they are very easy to clean. Be sure to test out all equipment on workout rides many times before use in competition. Many riders consider protective headgear to be essential equipment. Helmets are required for Junior riders.
Improper fit and adjustment of tack, particularly of the saddle, can cause galls and soreness through pressure or abrasion. Although saddle pads can help by cushioning, they rarely make up for a bad fit. Cinch sores can result from a cinch that is even slightly tight or rigged too far forward. A crupper and a breast collar are desirable for keeping the saddle in place on hills, but they too should not be too tight. Aside from galling, a poorly fitting breast collar can interfere with breathing and drinking. The 'V' shaped breast collars seem to work best for most trail horses.
Any bridle that affords good control without harming the horse is acceptable. Again, fit and adjustment are important. So are the rider's hands of course. Judges usually look carefully for bit rubs, chafes and cuts.
A halter and lead rope are needed at lunch stops for tying, but even if you decide to hold the horse instead, they are essential equipment for trail emergencies. Many riders leave the halter on under the bridle. Others opt for head gear that is a halter and bridle combination.
A cantle bag securely tied close behind the cantle rides well (better than saddle bags) and is adequate for most emergency items and personal needs. Pommel bags work well for extras. Essential items, such as a knife, hoof pick, lip balm, gps, and cell phone, should be carried by the rider.
There are no shoeing restrictions. All types of hoof boots that provide sole protection are allowed, but no attached strap, keeper, or gaiter may extend above the pastern. See current Rule Book.
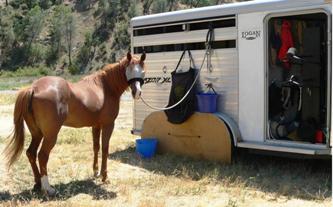
Photo by Jamie Dieterich
Safe, clutter-free stabling setup.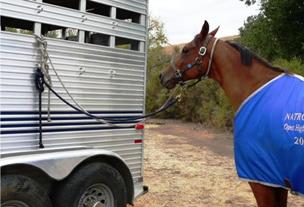
Photo by Jamie Dieterich
Stallions must be double tied to two different rings or points. See Rule Book.Since an important part of NATRC is camping safely with your horse, most horsemanship judges take the trailer check very seriously. They want to make sure that you have safe and comfortable stabling for your horse during the competition weekend. How you will secure your horse and care for his needs should be thought of before you ever leave home. Rings, bucket brackets and other modifications may be needed to make the trailer your horse's "home away from home".
At most NATRC rides, your horse will be tied to the trailer while not being ridden or walked. He should have water available to him at all times. It is a good idea to mount the buckets up over the wheels or at chest level on the trailer side to prevent a horse from pawing and accidentally catching his foot in the bucket. You will also need to devise a way to hang a hay bag within your horse's reach. Make sure it is tied up high and in such a way it will not droop too low when it gets empty and entangle your horse if he were to paw at it. Most horses will stand quietly tied to the trailer if they have a constant supply of hay and ample water.
Overhead trailer ties may be used. If the overhead tie system includes a length of bungee, it is safer if the bungee is attached to the overhead tie and the horse's halter rope attached to that. If the horse needs to be released quickly, it can be done at the joint of the halter rope and bungee, with the bungee snapping back away from the horse rather than towards him.
If the system includes a Velcro quick-release strap, it is intended that the strap at the end away from the horse go through the tie ring then be secured back around the bungee line so the pressure from the horse is on the bungee line (on the tie ring), not on the Velcro quick release strap itself.
It is not a good idea to tie a saddled horse to an overhead trailer tie as he can get the tie rope caught under the back of the saddle.
Sliding tethers are permitted at the discretion of ride management, usually depending on the campsite. There are several ways to set up a sliding tether: (1) a rope between two rings on the side of a trailer (wither-height or slightly above) with a ring on the rope so that the horse can "slide" along the side of the trailer for more movement, (2) a rope tied between two trailers, (3) a rope tied from the trailer to a tree, and (4) a rope tied from tree to tree.
Some camps are set up for overhead hi-lines between trees or between poles that have been installed in the campground for that use. If the campground allows hi-lines tied to trees, ALWAYS use a tree saver and stops to keep the horses away from the trees.
Portable corrals securely attached to the trailer or a tree are permitted at the discretion of ride management.
As with any sort of stabling, keeping the area cleaned and picked up is expected. Do not leave brushes, rakes or tack lying within your horse's reach. Make sure your rider number is taped to the trailer over where your horse is tied and that your horse has his halter tag number securely fastened. Follow the ride manager's orders on manure and hay disposal. At some rides you may scatter it neatly away from the horses; others demand you bag it for hauling out.
Once you are at a ride, take a break and walk about; inspect other people's rigs and ask questions. Most NATRC people will be happy to share their knowledge and share ideas for improving your set up. You will find that you become a lot more confident and safety conscious while camping with your horse. That is what NATRC is all about... fun and safety!
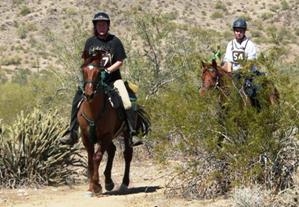
Photo by Jamie Dieterich
Try to keep at least one horse length between you and the horse ahead.Use common sense when it comes to trail safety and courtesy. When approaching a water stop, don't crowd in, wait your turn unless the other rider(s) say it's okay. On the other hand, if you're the one watering your horse, don't prolong your time and crowd others out. If you want your horse to drink more, move away and come back in a few minutes. Some horses will stop drinking if crowded by a strange horse or if a horse ahead leaves.
Don't dip your sponge directly in a water trough. Carry a collapsible bucket or a zip lock bag to fill with water then move your horse away from the trough to sponge.
At any trail "obstacle," judged or not, wait for the horse behind you to complete it before you move off down the trail. Otherwise the second horse might get in a hurry to "catch up with the herd."
Always let the person you're passing know that you are coming and on which side you will pass. Do not do an extended trot or canter past a horse that is walking or you might over excite it. Wait until you're well past to pick up your pace again. Always look back to check to be sure the horse you passed is not throwing a fit because you're leaving. Finally, if you need to pass another horse because your horse is faster paced, do not just pass by one horse length. Pass the horse and rider and get going down the trail. Riders will appreciate it if you get out of sight after you pass.
If your horse is particularly slow, find a place to pull off the trail and let others by. Sometimes this may take awhile, but let people behind you know that you'll pullover as soon as you can.
When going through a gate, the first rider usually opens it and holds it for the others. After they have all passed through, they should wait until the gate is closed and the rider who opened the gate resumes his place in front. Occasionally, one rider will open the gate and ask the last rider in the group to close it. This is fine as long as you know the message was heard and the gate will be closed.
Above all, be safe. If you are asked to do something that you don't think you or your horse are ready for, just tell the judge that you'll pass on that observation. Yes, you will lose points, but just one more point than the horse and rider team who did it the worst. It's better to be safe than get you or your horse hurt.
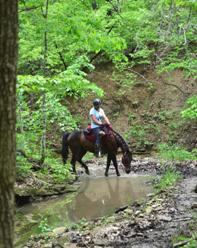
Photo by Andy Klamm
Dehydration is a huge enemy of the competitive distance horse. A loss of 3% of body water (about 4 gallons) can have an adverse effect on performance. The horse should be given a chance to drink at every opportunity, every hour on the trail if possible. Horses that are hot and breathing hard don't drink well. Give the horse a few minutes to catch his breath at a water stop, and give him a fair chance to drink before you go on. After he has drunk well, then give electrolytes if you so choose.
Sponging water on the horse at water stops is at your discretion, but never foul a drinking source. You can scoop water at water crossings or squirt water on the neck as you ride. If you soak the horse's neck and chest with water, scrape it off after a few seconds. The horse heats the water, and it can act as a heat trap. Soak, scrape, soak, scrape until the skin no longer feels hot.
If you loosen the cinch at the P&R stops, be sure it is still tight enough to remain functional; re-tighten it before you leave. Because there are a lot of sweat glands in the back, it is often beneficial to remove the saddle at a P&R stop or at lunch. If you let the horse graze with the bit in its mouth, be careful to not let the horse step on the reins and injure its mouth.
At the lunch stops and at the end of the ride, take care of the horse before yourself. Feeding at stops is at the discretion of the rider; hay would be better than grain for the horse. Tie the horse with a halter and lead rope. Avoid tying too close to other horses. The tie should be at about the height of the halter ring, and the lead should be long enough that the horse can just get its head to the ground. Use a quick-release knot with the end of the lead passed through the loop to secure the tie. Check and clean the horse's feet.
At the end of a day's ride, weather conditions determine how the horse should be cooled out. Reasonable sponging or bathing may be appropriate on hot days. Blanketing would be more appropriate on cool, windy days. Water should be available at all times after the horse has been properly cooled out. Hand walking is helpful. Feed hay first, and then grain.
Veterinary and Horsemanship Judges
Photo by Jamie Dieterich

Photo by Julie Willitt
Being able to mount safely is important; horseback riding always involves first getting on the horse. The perfect mount consists of a horse that is standing still and listening to his rider and a rider who mounts quickly and smoothly and lands lightly. As with other challenges the judges present to you, this one has lots of opportunities for you to do your best.
Before you present your horse for the judged mount, be ready by making sure the girth is snug, the breast collar is attached, the stirrups are down, saddle packs are snugged down, and the reins are attached to the bit. Proceed to the mounting place when it is your turn. It would be inconsiderate to the judge and the other riders to fiddle with your equipment and do last minute tack adjustments when you should be doing the mount.
Walk to the side of your horse and look directly over the saddle. Pick out something in the distance, a tree, a rock, anything on which you can focus as you mount. Put the rein hand on the neck and the other hand on the other side of the pommel to help prevent the saddle from shifting. Settle your horse before committing your foot to the stirrup. With your foot in the stirrup, push off with the other foot with a certain amount of "bounce." As you leave the ground, maintain your focus on the tree/rock. Settle lightly in the saddle, lowering yourself down instead of just dropping. The horse must not walk off and "leave" without the rider. Once you are up and straight, change your focus to looking above or between your horse's ears.
It is better for the horse if you use the terrain to mount as it helps you land more squarely into the saddle and not torque the saddle on the horse's back. Use a rock, log, or stump whenever you can. If you have any questions, simply ask the judge, "May I use that rock/log/stump to mount?" You might be asked to position your horse next to something such as a log or rock to do the mount.
Some people train their horses to "park out" while they mount. This not only gets the horse in a position when he is less likely to move/walk off during the mount, but also usually lowers the stirrup and makes it easier for the rider to get mounted.
The key is practice, practice, practice. Your horse will never learn to stand still for the mount unless you insist that he stands for every single mount. Bev Tibbitts, one of our early and best horsemanship judges, always seemed to have the perfect mount. She would practice by mounting and dismounting six times each time she got on her horse. She mounted on the near side, dismounted on the off-side, then mounted from the off-side and dismounted on the near side. The horse soon learned that it wasn't going anywhere for awhile.
Drawing by Priscilla Lindsey
Drawing by Bethany Caskey
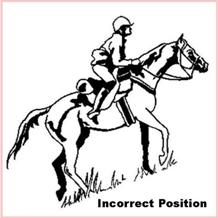
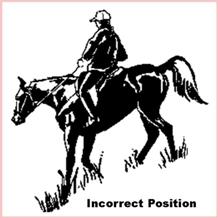
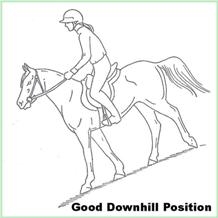
Sometime during every ride, you will be faced with doing a judged climb or descent. Regardless of whether it is a mountain side or a creek bank, the judges will be looking for the same things. The horse's job is fairly simple. He should do the slope with calm deliberation at a slow pace, carefully placing his feet and going straight up or down the trail when asked. The veterinary judge will usually fault the horse for "crabbing" sideways going down, rushing, crowding another horse, excessive nervousness, and head tossing.
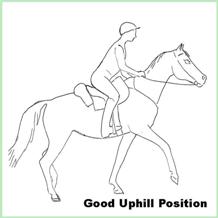
For the rider, the ascents and descents present a multitude of ways to shine. Going up hills, there is a "window" of good upper body position. If you lean too far back or are too far forward over the neck, you will make the horse's job more difficult. If you are too far out of the saddle, you sacrifice stability and safety. You should fold slightly forward from the hips in an amount appropriate for the slope of the hill and the speed of the horse. Support yourself by rolling up onto your inner thighs so you can have your seat lightly off the saddle to make it easier for the horse to get its rear legs under him for upward push. It is all right to take a handful of mane to steady yourself as long as it doesn't interfere with the rein control. The reins should be short enough to guide your horse easily, but long enough that he can get his head down for balance on the climb. Maintain your form and control to the top of the hill. It takes muscles and coordination that come only with practice. The judge will interpret how well you're moving with your horse.
Maintain your balance going down hills. Don't lean back; this makes it harder for the horse to use his hindquarters to "brake" himself. Don't grab the back of the saddle to stabilize yourself. Doing so puts you off balance and twists you in the saddle. One of the most common faults is "body sway" which is the rolling of your upper body from side to side as the horse descends. This not only makes it very difficult for the horse to stay in balance, it can cause saddle rubs.
Whenever you have an uphill/downhill combination obstacle, the judge is probably watching your transition. If you are balanced and moving as one with you horse, you should not get thrown off-balance or put behind the action of the horse as he makes the transition. If possible, take a moment in the middle to collect yourself and gather up your horse. Make sure you allow the horse ahead of you enough time to clear the obstacle before proceeding.
Practicing this skill can only be done on the trail as few arenas are so unlevel as to allow for real hill work. Ups and downs are best done with a buddy, taking turns going first while the other waits and critiques. This lets the first rider know what they are doing right/wrong and the second horse gets practice waiting its turn. Don't expect instant perfection; this requires excellent muscle control for both horse and rider. As with any other NATRC obstacle, you will be penalized for crowding another rider.
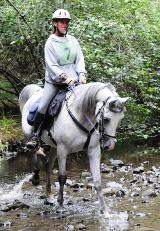
Photo by Bob Dorsey
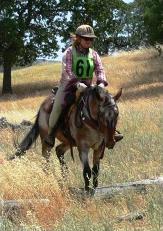
Photo by Jamie Dieterich
Under most circumstances, crossing logs and crossing water is pretty much the same. The horse should cross both without hesitation, paying attention to where he puts his feet and the rider's aids. If there have been instructions, follow them as closely as possible. Do not be afraid to ask questions. It is usually permissible to let your horse stop and drink when crossing water, but you should not hold up other riders. Be considerate. If you think your horse needs to drink, move off to the side after the judge has evaluated you so as to let the next rider pass.
Most veterinary judges like to see a horse cross logs without touching them. It shows that the animal is focused and aware of its surroundings. The horsemanship judges are looking for attentive riders, balanced in the saddle, and guiding their horses over the safest route. To stay balanced, do not look down as you cross the obstacle. This will move your weight over to the side you look down and affect the horse's balance. Size up the obstacle BEFORE you begin, and then keep your eyes focused ahead as you proceed through.
It is usually considered unsafe to jump an obstacle. If you choose to jump, maintain your balance and stay with the action of the horse so you don't get whiplash. Don't look down as you go over.
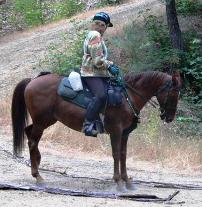
Photo by Jamie Dieterich
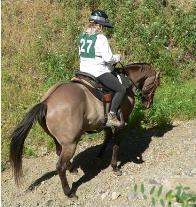
Photo by Jamie Dieterich
A good trail horse is much more than one who will willingly go forward. In order to deal with the unknowns of the trail, he needs to be able to backup and move over just as easily as he goes forward. Along with exhibiting your horse's willingness to obey, these skills demonstrate your ability to control and direct your horse's hindquarters. These types of skills highlight your horse's trust in you and your ability to guide him using your seat, legs, and hands.
Since backing up does not require any special props, such as logs or water, the judges may ask it anywhere. The simplest approach to this obstacle is for the judge to stop you on trail and request that you back your horse 5 steps. Collect your horse, glance back to make sure the space is clear, take a deep breath and ask your horse to back. Back ONLY the number of steps requested; do not make the mistake of thinking more is better! It is a good idea to count the steps out loud so both you and the judge are in sync.
There are several variations on the backup obstacle. Depending on what is available, the judge might ask you to back between two certain trees, back between two logs laid on the ground, back through some water, back up an incline or even back in an L-shaped pattern. Regardless of what you are asked to back through, the judges will be looking for an animal that backs straightly, smoothly, and willingly.
Knowing how to side pass can really make a difference in safety on the trail as well as on your score cards. This move comes in very handy if you are asked to open/close a gate, tie a ribbon, or pick up something lying over a fence. One of the most basic side pass obstacles is side passing down a log. You might be asked to step your animal's front legs over a log and then side pass left (or right), then back off or ride forward. Another common request would be to take a ribbon from the judge, then move over several steps to a tree and tie the ribbon.
Then practicing these types of skills at home, don't forget to do them from the ground as well. Not only can this help the horse understand the maneuver, sometimes the judges will ask you to perform these skills in-hand. Luckily these require no special equipment and can be easily practiced anywhere. Once your horse backs up and side passes willingly for you, you will find more and more occasions to use these new abilities.


